Tuesday, December 28, 2010

The Miracle in Me & My Greatest Gift


When I noticed a bump, I suspected, but I said to myself 'too soon.' At that point, I would have only been within my first week. As the weeks progressed, and the tell-tale symptoms along with time, there was no more denying. I finally confirmed my pregnancy nearly four weeks later. When the pain in my lower back and abdomen began and then persisted, along with the growth of my belly, I knew something wasn't quite right. I had been feeling this way for a couple of weeks. Upon the reassurance of women who've had children before: 'You're fine', 'I experienced the same thing with my first.' 'That's normal.' and so on, I tried to let their words ease my fears, but in my heart, I knew differently.
After an agonizing 3 weeks of self imposed bed rest, my appointment with the Ob/GYN finally arrived. After the needles, exam and two types of ultrasound, my fears were confirmed. The size of my abdomen and pain were indeed an indicator of a problem. No poetic way to articulate this: I have a fibroids. Such is the case, my pregnancy is high risk. But my hopes remain higher than any risk could be.

Ultrasound: 12/21/2010
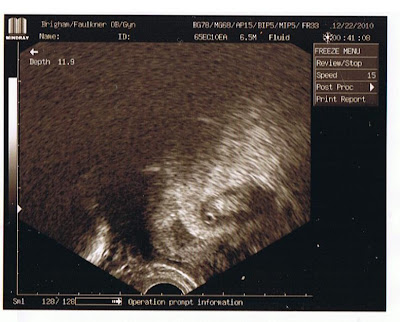


Today, I will venture out in the blizzard of '10 to my first appointment with the high risk Ob/GYN at Brigham & Women's hospital, where they specialize in such pregnancies.
Now upon my 10th (or so) week, I've decided I will allow myself to relish the glory of this tiny being becoming inside of my body, come what may. Something I, hitherto, was reluctant to do. Daph and I are overjoyed! We're becoming parents. WE'RE HAVING A BABY! I never thought I would be able to say those words, but it's true. I'm not dreaming.
I couldn't have imagined the fearlessness and unconstraint with which you could love another human being until the moment I learned that human being was beginning inside my own being. What an incredible thing!

Update: Earlier today I trenched through the 17 inches of snow and made it to my ultrasound appointment in tact. After a more in depth ultrasound I learned I have "innumerable fibroids" and an ovarian cyst. I'm the kind of person who thrives on information, no matter how bad or difficult it is to hear and deal with. So, aside from the natural fears and concerns, I also feel empowered. The baby's heart is beating at 171 beats per minute, and she/he is active. The baby seems as determined as I am to pull through okay.

Ultrasound: 12/27/2010


My Dearest Baby,

I will fight for you, with you, to keep you growing and strong in only the way a mother could. There is nothing stronger than the will of a mother for her child. 32 years ago on the day you are due to be born, I was born. This confirms everything I believed that, despite it all, ultimately only the best things were meant for my life. And equally, only the best things will be dreamed for yours.

I love You,

Mommy
Wednesday, December 15, 2010

& The Winner Is...

Katrina, number 5. Congratulations Katrina! I'm sure your daughter will enjoy her trunki.
Check your email shortly for the promotional code.

Thanks to everyone who participated!

Tuesday, December 7, 2010

CSN Stores Giveaway & I'm So Excited!

When CSN Stores contacted me and asked if I'd like to host a giveaway for my readers, I was super thrilled. Whether you're looking for Leather Messenger Bags, home decor, awesome cook and bakeware, or anything in between, CSN Stores has got you covered. If you haven't yet visited one of their 200+ websites, CSN Stores offer virtually everything. And today, they've generously offered a $55 dollar promotional code to one of my lucky readers. Now you're excited too, right? Good!

Here are just a few of the things I love.

David King Three Compartment Messenger Bag


Blissliving Home Gemini Pillow


Rachael Ray “Bubble & Brown” 2-Piece Stoneware Baker Set


Nordicware Kugelhopf Bundt Pan


*To Enter You must be a U.S. or Canadian resident. Sorry to the rest of my international friends.

*Leave a comment telling me how you'd like to spend the $55 dollars at CSN Stores.

* Additional entries can be made by leaving separate comments letting me know you've liked CSN on Facebook or follow CSN on Twitter.

*Don't forget to include your email so I can contact you when you win.


Giveaway ends December 14th, 2010 at 11: 59 p.m. EST. Winner will be chosen via random number generator.


Good Luck, Everyone!

Friday, December 3, 2010

Thanksgiving Pt. 2 & Cranberry Apple Pie


This, the second of our two Thanksgiving pies, is my new absolute favorite pie of all time. Hands down! Hitherto, I thought I didn't like apple pie very much (because I don't like most apples), but when I came across a recipe that called for green apples (the only apple I do like) I was eager to give it a try. And the addition of cranberries made it all but impossible for me to not make it. I had exactly two cups of Lee's lovely cranberries remaining in the freezer, waiting for the perfect excuse to be used. This. Is. Quintessential. New England. Served with homemade ice cream, whipped cream, or both, cranberry apple pie will happily make an annual return to the dining table come every holiday season. And maybe yours, too!


Cranberry Green Apple Pie
Recipe courtesy and adapted from Taste of Home


Ingredients:

1 & 3/4 cups sugar (I cut this down from the original two cups)

1/4 cup cornstarch

1/4 cup orange juice

1/2 teaspoon ground cinnamon*

1/2 teaspoon apple pie spice*

1/8 teaspoon ground nutmeg*

1/4 teaspoon lemon juice

4 cups sliced peeled tart apples

2 cups fresh or frozen cranberries

Pastry for double-crust pie (9 inches)

2 tablespoons butter

1 tablespoon each flour and sugar, mixed

In place of the spices called for, I used 1/2 teaspoon homemade apple pie spice blend and 1/4 teaspoon cinnamon.


Apple Pie Spice Blend

1 Tbsp. ground cinnamon
1 1/2 tsp. ground nutmeg
1 tsp. ground allspice
1/4 tsp. ground cloves

Add all ingredients to small bowl or zip shut bag and mix (or shake, in bag). Store remaining mix.


Directions:

Add first 7 ingredients to large bowl and stir to combine. To same bowl, add in sliced apple and cranberries; gently toss to coat. *See below for pie crust directions.
Sprinkle bottom crust with flour-sugar mixture. Add apple mixture to bottom pie crust. Add 1 & 1/2 tablespoons of butter in small pieces over apples. Add top crust; fold hanging edges underneath and crimp to seal. When pie is assembled, cut vents in top of crust to allow air to escape while baking.

Refrigerate pie while preheating oven to 450 degrees. Add pie to preheated oven and bake for 10 minutes. After 10 minutes, lower heat to 350 degrees and bake for 50-60 minutes or until top of pie is golden brown and filling is bubbling. Allow to cool and set before cutting.

Shortening-Butter Crust:

2 1/2 cup all-purpose unbleached flour, plus extra for rolling
2 teaspoon salt
3 tablespoons granulated sugar
1/2 cup Plus 1 teaspoon chilled vegetable shortening
1/2 cup cold unsalted butter, cut into 1/4-inch pieces
6 to 8 tablespoons ice water

Tools:

Rolling Pin
Wax Paper

To Sprinkle over bottom of crust before adding fruit:

Mix together 1 tablespoon each, flour and granulated sugar. This will help prevent pie filling juices from soaking through bottom of crust.


To Make Crust:

In standard sized food processor, or large bowl, process, or mix with hand mixer, flour, salt and sugar until combined. Add in shortening and process or mix until mixture resembles coarse sand, approximately 10 seconds. Add pieces of butter over flour mixture and process in 1 second pulses, or mix, turning hand mixer on then off, until pieces of butter are no bigger than small peas. Add 6 tablespoons ice water to mixture and, using a rubber spatula or hand mixer on low, fold in, or mix until just combined. Pinch dough with fingertips to be sure it sticks together, If not, add an additional 2 tablespoons ice water. Do not process or mix more than 30 seconds.
Turn dough onto work surface and gather into ball. Divide dough in half and flatten each into a round disk-like shape. Cover each with plastic wrap and refrigerate at least 1 hour before using.

After an hour, remove one round of dough from refrigerator. Measure out and lightly flour two equal pieces of wax paper. Place dough, in center, between two pieces of wax paper, begin to flatten round of dough with rolling pin. Give wax paper square a quarter turn after each roll. Roll dough two inches larger than inverted pie plate. (Place pie plate, upside down, over dough to make sure it's big enough.) Carefully remove only top layer of wax paper. Turn remaining wax paper holding dough, so that the dough is facing down, into pie pan. Make sure dough is even in pan. Carefully remove second piece of wax paper, which should be bottom side up. Brush off excess flour. Roll hanging dough under itself to crimp or cut off excess. Cover and refrigerate for 30 minutes. Reserve both pieces of wax paper and repeat process of rolling with second dough round, only this time, leave rolled out dough in wax paper and refrigerate until needed.

Monday, November 29, 2010

Thanksgiving & Sweet Potato Pie


Even though there was only my grandmother and I celebrating Thanksgiving this year at my house, we were both really looking forward to it. Due in large part to the FOOD. But that seems to be a universal sentiment this time of year. And of course, I had so much to celebrate and be thankful for, but that's not limited to just one day. I'm grateful everyday. I hope you, too, have many reasons to feel thankful.

This year was different in that we ventured away from our usual store bought desserts and I made everything from scratch. Believe it or not, I have less than a year total baking experience. Before then, most of the things I cooked were pre-packaged, frozen and re-heated. What a difference a year can make! Most of the food you'd find in my kitchen these days are things I made myself.

I, myself don't eat any pie with egg in it, but when my grandmother requested a sweet potato pie for Thanksgiving, I was happy to oblige. If you've seen my previous posts' Here, and Here, you know I've fallen in love with pie making over the months.

I chose this one especially for its inclusion of maple syrup, which I thought sounded perfect for the Holiday.


Sweet Potato Pie
Recipes courtesy and adapted from Simply Recipes and MomsWhoThink


Ingredients:

1/4 cup butter, softened
2 eggs
3/4 cup sugar
2 tablespoon real maple syrup
3/4 cup heavy cream
1 1/2 cups cooked mashed sweet potatoes
1 &1/2 teaspoon(s) vanilla extract
1/2 teaspoon nutmeg
1/2 teaspoon cinnamon


To Make Filling:

1. Preheat oven to 375F.

2. Poke holes in two sweet potatoes. Cover in aluminum foil and bake for 1 hour and ten minutes or until soft. When ready, continue to next step.

3. In large bowl, use an electric mixer to cream together butter and sugar until light and fluffy. Turn speed to low and add in eggs 1 at a time.

4. Add in remaining ingredients: remove skin from sweet potatoes and measure out 1 and 1/2 cups filling, maple syrup, vanilla, cream, nutmeg and cinnamon, mix on low or stir until combined.

*See below for crust instructions.

Cover sides and top of pie crust completely with aluminum foil. Use fork to create holes in bottom of crust. Place pan with bottom crust in oven and bake for 5-7 minutes, or until bottom crust lightly browns on 375 degrees. Remove pan from oven. Carefully remove aluminum foil.

Reduce oven to 350 degrees. Pour sweet potato filling into pie crust and bake for 40 minutes, or until firm.


To Make Crust:

In standard sized food processor, or large bowl, process, or mix with hand mixer, flour, salt and sugar until combined. Add in shortening and process or mix until mixture resembles coarse sand, approximately 10 seconds. Add pieces of butter over flour mixture and process in 1 second pulses, or mix, turning hand mixer on then off, until pieces of butter are no bigger than small peas. Add 6 tablespoons ice water to mixture and, using a rubber spatula or hand mixer on low, fold in, or mix until just combined. Pinch dough with fingertips to be sure it sticks together, If not, add an additional 2 tablespoons ice water. Do not process or mix more than 30 seconds.
Turn dough onto work surface and gather into ball. Divide dough in half and flatten each into a round disk-like shape. Cover each with plastic wrap and refrigerate at least 1 hour before using.

After an hour, remove one round of dough from refrigerator. Measure out and lightly flour two equal pieces of wax paper. Place dough, in center, between two pieces of wax paper, begin to flatten round of dough with rolling pin. Give wax paper square a quarter turn after each roll. Roll dough two inches larger than inverted pie plate. (Place pie plate, upside down, over dough to make sure it's big enough.) Carefully remove only top layer of wax paper. Turn remaining wax paper holding dough, so that the dough is facing down, into pie pan. Make sure dough is even in pan. Carefully remove second piece of wax paper, which should be bottom side up. Brush off excess flour. Roll hanging dough under itself to crimp or cut off excess. Cover and refrigerate for 30 minutes. Reserve both pieces of wax paper and repeat process of rolling with second dough round.

Using a cookie cutter, cut out the shape you desire using to decorate top of crust. Place shapes on lined cookie sheet, remove excess dough, cover with plastic wrap and refrigerate until needed.
(I used maple leafs.)


Once pie has cooled, baked shapes in preheated 400 degree oven for about ten minutes, or until lightly browned. Allow shapes to cool and assemble over top of pie.


Friday, November 26, 2010

Vanilla, Mint & The Extract Experiment


Hi Everyone,

For those of us who celebrate Thanksgiving in the U.S., I hope you enjoyed a wonderful holiday filled with love, family, friends, delicious food and a lot to be thankful for. And for my friends around the world, I wish you all the same and a joyous holiday season ahead.

Today's post is simple and short, but something I'm really excited to share. All of us bakers, often or occasional, know how quickly we can go through vanilla extract, so when I came across the recipe for vanilla extract quite some time ago and saw how easy it was, I knew it was something I'd definitely get around to making.

Because I also use a lot of mint in homemade ice cream, I thought I'd give that one a try, too.

Homemade Vanilla Extract


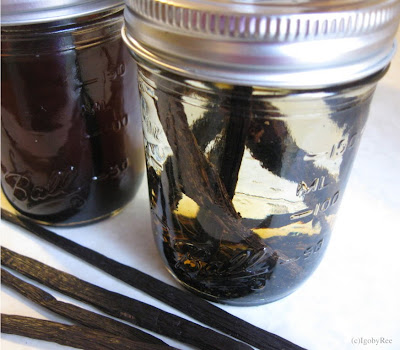
You only need two ingredients:

Vanilla Beans, 3-4, split down the middle
1 Cup Vodka

And patience for one month.

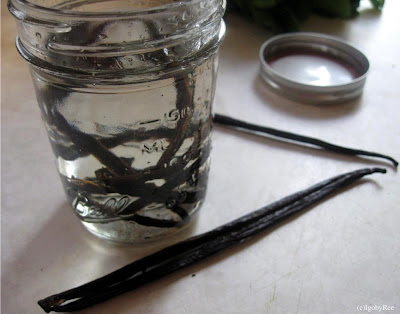
For the mint, I used a handful. (But wait, we'll talk about this version in a minute.)

Simply fill a clean jar with 1 cup vodka and 3-4 vanilla beans split down the middle. Cover tightly, shake well and store in a cool dark place. You'll keep the jar stored in a cool, dark place for 1 month, continuing to give the jar a hearty shake once or twice a week...

After one month, you'll be left with an all natural, old-fashioned, full-bodied delicious vanilla that will easily take the place of anything you could buy in the store. I just can't stress enough how much I LOVE this vanilla. I've already made a second jar in preparation for the holiday season. Only this time, I mixed Tahitian and Bourbon Madagascar beans, where the first time I only used Tahitian.


Unfortunately, the same cannot be said for the mint extract. The principle is the same; Store in a cool, dark place, shake, wait a month...
After a week the mint started to turn brown and the vodka took on notes of the dying herb (imagine cut flowers that have been left to die in a vase). Curious, I tasted it and it is very minty, but stale nonetheless. Alas, that extract will be thrown out.


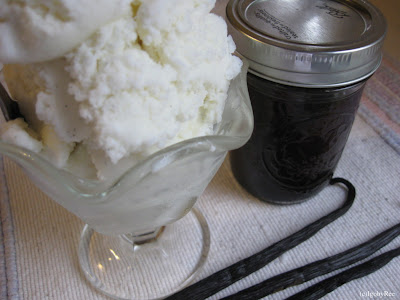
My grandmother said this homemade vanilla ice cream reminds her of her childhood. I'd say that's a ringing endorsement for making your own extract.

Monday, November 22, 2010

North End & The New England Aquarium

After returning from Maine, my body, in what was obviously a sign of disapproval, responded to me leaving that gorgeous town by getting sick. After a week and 2 days stuck at home, most of which were spent in bed, I was glad to be feeling better and eager to get out and enjoy the time I had left with Daph.

We searched and searched for restaurants worthy of a try before giving into the glowing reviews about the awesome food at Giacamo's in The North End of Boston.
If you live or have ever visited Boston and are familiar with Hanover St., you know you can't trip without falling into an Italian restaurant, bakery or eatery of some kind. Much to my gluttonous delight!

No special treatment here! You wait on line outside and are seated according to how many people are in your party and how many chairs they have available.
Being only two, Daph and I got seats pretty quickly overlooking the kitchen.

Giacamo's is a tiny space where our waitress, Jenny, encouraged us to "crowd in and get close like family."
They don't bother with menus either. Which I liked. You peer over to the left wall where the entire menu and daily specials are listed in colorful chalk on a large chalkboard.


I started with a small fried calamari served with the house red sauce for dipping. This was my first calamari experience and I loved them.


Daph ordered the caprese salad. This was standard, but he really enjoyed it.


For the main course, I went with something else new to me, pumpkin tortellini, with sage and marscipone sauce. It was creamy and sweeter than you might expect. I thought the flavor was great, but after a few bites grew tired of the sweetness and wished I'd ordered something more savory.


Daph ordered the fettucini with salmon in traditional red sauce. We both thought this was delicious. He was kind enough to share, so we ate from his plate together.
(I'll post a red sauce recipe you can make at home that rivals Giacamo's soon!)


We loved our overall experience. We read reviews about rude waitresses/waiters, but saw none of that. Jenny, our waitress, couldn't have been anymore charming and welcoming. Giacamo's only takes cash.

As the restaurant is so small, no dessert is served. For dessert we walked up a block to Mike's Pastries for cannoli's. After pushing our way through the ravenous crowd (which you're encouraged to do), I called out my order from what I gathered they might have. Mike's is so crowded you can't see the cases, and you have to order quickly.

We came home with Pistachio, chocolate chip, and lobster claw cannoli's (the latter is filled with traditional lobster claw filling, not ricotta), a whoopi pie, a piece of Boston creme pie (which is actually custard filled cake) and an eclair for my grandmother.
The pistachio cannoli's were our favorite!


Later in the week we used the free passes I got from the Boston Public Library to visit the New England Aquarium. If you have a library card in Boston, free passes are available at the library to most of the Museums and other attractions in the city. You just have to call to request a day and pick them up!


I hadn't been to the aquarium in years and didn't remember it being so small (the outside is misleading), but it was. The things we did see were beautiful, but unfortunately, we saw no sharks in the ascending spiral tank! That's what we were really looking forward to. And the penguins. No fear, the adorable penguins still greet you upon entrance into the aquarium.


The month Daph was here was magical for the both of us. I couldn't imagine it was possible, but I fell in love with him all over again, deeper than ever before. He arrived the man I planned to spend the rest of my life with, and left...(after eloping November 5th), My Husband. And the man I always will.

I'm so happy I could share that month with all of you, My Blogger Friends.

Saturday, November 20, 2010

So Good & Honey Oatmeal Wheat Bread


When I sent pictures of this bread to my husband, he asked which I liked best, the Honey Oatmeal Wheat, or the Harvest Squash Bread I made a couple of months back. Without hesitation, I answered: "They're both so good, there's just no choosing."
The Honey Wheat for its soft, chewy, ever so slightly sweet, perfect for sandwiches and toasting ability. And the Harvest Squash Bread for its rustic, overnight developed, hearty, earthy, perfect alongside or dipped into soups quality. I haven't been working with yeast very long, but I can tell you if you haven't yet, it's addictive. There's something primitively satisfying about pulling a loaf or two of bread you nurtured, developed and worked with your own two hands out of the oven, and confirming with each bite thereafter. If I haven't convinced you already, don't deprive yourself of that magic any longer.

Honey Oatmeal Wheat Bread
Recipe courtesy and adapted from The Fresh Loaf And AllRecipes.com


Ingredients:

2 Cup boiled water
1 Cup rolled oats
2 1/2 teaspoon salt
1 tablespoon butter
1/2 Cup honey or molasses
1/3 Cup warm water
2 packets active dry yeast
3 Cups white bread flour
2 Cups whole wheat flour
Plus Additional bread flour for kneading, up to 1 cup. If using all white flour, you may need more. If using whole wheat flour, you should need less.
2 tablespoons honey, warmed slightly. 2 tablespoons oats. (Optional)


Directions:

1.
In medium saucepan boil 2 cups water. Remove from heat (turn stove off), add oats, honey and butter. Allow to soak for 20 minutes. After the oats have soaked for 10 minutes, begin preparing remaining ingredients.

2. In large bowl, sprinkle yeast over 1/3 cup warm water. Let stand 5-10 minutes. While yeast is soaking, in separate bowl, measure out flour and stir salt into flour with fork. Once the oats have soaked 20 minutes and have cooled some, add soaked oats into bowl with yeast. Stir and let stand 5 minutes or until foamy.

3. Add flour, 1 cup at a time, into bowl with foamy yeast. With wooden spoon, stir ingredients to incorporate. (A lot of the flour will remain after mixing, this will be fully incorporated after kneading.) Turn ingredients out from bowl onto clean surface or countertop. Form into mound with hands. Incorporate ingredients and begin to knead. If dough is too sticky, add in additional flour 1 teaspoon at a time. (I needed an additional 2 teaspoons). Continue kneading dough for approximately 15 minutes, or until dough becomes smooth, soft and feels lighter.

4. Clean and thoroughly dry large bowl. Use canola or vegetable oil to lightly oil bowl. Place dough in bowl and turn to coat with oil. Use plastic wrap to cover bowl and allow dough to rise in warm place until doubled in size, approximately 1 hour.

5. Once dough has risen, punch dough down to remove air and turn out onto clean surface. Cut dough in half and form into 2 loaves, big enough to fit bread pans. Lightly oil two bread pans and add 1 formed loaf of dough to each pan. Cover and let double in size in warm place, for approximately 40 minutes. Preheat oven to 350 degrees. Once loaves have risen, use serrated knife to make slits if desired and baste each loaf of dough with melted butter or beaten egg.

6. Turn oven up to 375. Bake bread for 30 minutes or until tops have turned golden brown and, when tapped with fingertip, bottom of bread sounds hollow. Remove loaves from pans and transfer to cooling rack. Brush top of each loaf with slightly warmed honey and sprinkle with oats, if desired.


Just out of the oven, still warm and covered in honey, this bread glistens and begs to be eaten.


Toasted or plain, spread with Homemade Raspberry Jam, this bread really shone.
Related Posts with Thumbnails