Wednesday, September 29, 2010

"Chocolat" & "Chocolat(e)" Graham Crackers


Several posts' back I mentioned Food 'n Flix, a blog started by my friend Heather over at Girlichef, who was so kind to ask if I would co-host along with her. Every month we feature a different movie that, directly or indirectly, relates to food. We invite everyone to watch the movie then cook/bake/make something that ties in to the movie of the month and blog about it. Fun!

This month's selection was "Chocolat," a film I described in my Chocolate-Walnut Fudge Cake post as a "sweet confection." What I should have said, however, is that along with Juliette Binoche, the film also stars Johnny Depp, that sweet confection of handsome. And waxes poetic about the wonders and magic of, what is inarguably, the sixth major food group; Begging, imploring, soliciting you to do only one thing, conjure up a little confectionery magic of your own and do it with Chocolat(e). Of course.

These graham's were rich, easy-to-make and delicious. They could just as easily be transformed into a crust for a fabulous pie or cheesecake, eaten alone, or topped with something equally yummy.

Chocolate Graham Crackers
Recipe courtesy and Adapted from King Arthur Flour

Ingredients:

1/2 cup (2 ounces) Unbleached All-Purpose Flour
3/4 cup (3 3/4 ounces) Whole Wheat Flour, Traditional or White Whole Wheat (I like King Arthur best)
1/2 teaspoon salt
1/2 cup (1 1/2 ounces) Dutch-process cocoa
1 1/4 cups (5 ounces) confectioners' sugar
1 teaspoon baking powder
1/2 cup (1 stick, 4 ounces) unsalted butter
2 tablespoons (1 1/2 ounces) honey
2 tablespoons (1 ounce) cold milk

Method:

Preheat your oven to 325°F. Line two cookie sheets with parchment paper.


Add all of your dry ingredients to medium sized bowl and whisk together. Using either pastry blender, two knives, or the tips of your fingers, cut butter into dry ingredients until coarse crumbles form. In small separate bowl, mix honey in milk until dissolved. Add milk-honey mixture to dry ingredients and, using fork, mix until dry ingredients become moistened and dough clumps. If necessary, add a little more milk.


Transfer dough from bowl to floured surface. Gently fold dough onto itself 10-12 times, until completely formed together. Cut dough in half. Set one half aside and cover.
Place one half of dough onto parchment paper (the piece you used to line your cookie sheet). Roll out, into slightly larger than 10 x 14 rectangle. Approximately 1/16 inch in thickness. Neaten edges by trimming with knife or pizza cutter. Using dough docker or fork, prick dough evenly. Repeat with second half of dough and return to baking sheets (on parchment paper).
Add cookie sheets to oven and bake for 15 minutes, or until the most gorgeous scent of chocolate begins to waft throughout your kitchen. Take sheets out of oven, place on flat surface and use pizza cutter or knife to cut into squares immediately. Remove from cookie sheets and allow to cool on cooling rack.


Store crackers, securely wrapped, in cool place.


Saturday, September 25, 2010

Part 2 Of 2 & Pear-Cheese Tart (with gingersnap crust)


*This is a continuation of a two-part post. The first of which can be opened in a separate page HERE.

When I started cooking again more seriously several months back, after not for nearly a decade, I endeavored to accomplish two things: Be more adventurous. Try something new. I have a bad habit of falling into a comfort zone and staying there. Once things become pro forma, I get bored and quit.

Case in point, Clarinet: Quit after 100 sum odd torture inducing solo performances of 'Mary Had a Little Lamb'. High school: Quit! After 9 years of formal (what I guess the Boston Public School System is passing for) "education," I left with what little of my dignity remained and a letter of dismissal. Kickboxing: Training 4-6 hours a day became my life. I lived and breathed this sport which, to this day, remains my love. Alas, eventually the routine grew tiring and I quit!

What I've since come to realize about myself is that it's not "routine" that wears on my fortitude, as much as it's the frame in which my perspective is held. "Change the way you look at something, and the thing itself changes." If I learned to play a song I enjoyed on the clarinet, maybe I would have stuck with it. If I transferred to a school with a less traditional approach, maybe I would have felt challenged enough to not drop out. If I expanded my method of training to include...well, you get the point. I'd still have those gorgeous abs!

I do come back to the things I love eventually, if they're good for me. I always do. Only, with the lessons quitting has taught me and a new perspective. Hundreds of books and essays and articles read, I've always loved and valued learning. Kickboxing has worked its way back into my daily routine without becoming routine. And I prefer listening to rather than making music. So it goes...

This dessert is a favorite in my house and something I make often with graham cracker crust and seasonal fruit, like pineapple or strawberries.


Today's version was born out of a willingness to try something I wouldn't have expected in a sweet treat, like ground black pepper in Gingersnap Cookies. Which I now see totally makes sense. And a desire to change my opinion about something I've never been too fond of: pears. A fruit I learned I can enjoy if pictured in the right frame.


Pear-Cheese Tart with (Chez Panisse recipe) Gingersnap Cookie Crust

Recipes couresty and Adapted from The Art of Simple Food: Notes, Lessons, and Recipes from a Delicious Revolution (Clarkson Potter) by Alice Waters, via David Lebovitz. And Moi.

Topping:

4 Sweet Bartlett Pears (Or a mix of Bartlett and Bosc)
1/4 Cup brown sugar
1/8 teaspoon ground cinnamon
1 teaspoon lemon zest
1 teaspoon lemon juice
1 tablespoon cornstarch
1/2 teaspoon orange zest (Optional)

Crust:

2 cups crushed Chez Panisse recipe Gingersnap Cookies
3/4 stick butter (6 tablespoons)


Filling:

1 1/4 cup heavy/whipping cream (Prepared)
2 tablespoons confectioner's sugar
1 teaspoon vanilla

One 8 oz. package Philadelphia cream cheese
1 tablespoon confectioner's sugar


Method:

Peel pears. Cut in half and remove core. Cut pears in slices. Add slices to medium sauce pan with lemon juice, zest, brown sugar, and corn starch. Cook over medium heat until ingredients have combined and pears have broken down some, about 5 minutes. Cover and set aside to cool.

Preheat oven to 350 degrees F.
Crush gingersnap cookies in food processor. Slowly add in melted butter until combined. Pour mixture into pie pan and, with the heel of your hand, form into crust around bottom and sides of pan. Bake for 12 minutes. Set aside to cool.

Add cream cheese and 1 tablespoon confectioner's sugar to medium bowl and mix until creamy. In separate bowl, lightly whip heavy cream, 2 tablespoons confectioner's sugar and vanilla into soft peaks. Fold whipped cream into cream cheese until mostly combined. Using mixer, mix until completely combined and smooth. Taste for sweetness and adjust as necessary.

Assembly:

Scrape cream cheese mixture into cooled crust. Spread evenly. Spoon cooled pear mixture over cream cheese. Cover with plastic wrap and refrigerate 4 hours, or until set up.

Thursday, September 23, 2010

Part 1 0f 2 & Chez Panisse Gingersnap Cookies


*This is part one of a two-part post. The second of which can be opened in a separate page HERE.

Initially I considered graham crackers, which is what I've always used for the crust of the dessert I was making. In honor of fall, I thought I would try something that spoke to the flavor and tradition of the season, and make a gingersnap-cookie crust instead. But first, I needed gingersnaps. I found one recipe, on David Lebovitz' website, that separated itself from all the rest and intrigued me with its inclusion of ground black pepper. So, off to bake I went. From the moment I opened the jar of molasses, the main ingredient, I was...well, nervous. I recoiled as the smell reached out from the jar and smacked me in the face. I haven't worked with molasses in over ten years and had forgotten how much I don't like the smell of it.
I've had gingersnaps before. I knew I liked the flavor, but the smell of molasses threw me a bit. Until I placed the cookies in the oven to bake, I was convinced I made a mistake in not sticking with the graham cracker crust I was used to. Five minutes in, something happened. Something magical. The aroma of cinnamon, ginger and nutmeg married and settled in, perfumed the air, transforming my kitchen into something that, if I closed my eyes, I would have mistaken for a gingerbread house. I felt, at once, warmth and welcomed home. What I pulled out of the oven was delicious, full-bodied, with an ever-so-slight surprise kick of pepper delightfully ending each bite.

"Autumn is the eternal corrective. It is ripeness and color and a time of maturity;
but it is also breadth, and depth, and distance. What man can stand with autumn on a hilltop and fail to see the span of his world and the meaning of the rolling hills that reach to the far horizon?"
--Hal Borland


Ginger Snaps
Makes 40-50 cookies

Recipe couresty and Adapted from The Art of Simple Food: Notes, Lessons, and Recipes from a Delicious Revolution (Clarkson Potter) by Alice Waters. Via David Lebovitz


1/4-1/2 teaspoon Cardamom, Allspice or Cloves could also be added.


Ingredients:

2 cups flour
1 ½ teaspoons baking soda
½ teaspoon salt
2 teaspoons ground cinnamon
1½ teaspoons ground ginger
½ teaspoon ground black pepper
1/4 teaspoon nutmeg
11 tablespoons butter, salted or unsalted, at room temperature
2/3 cup sugar (I mixed white and brown)
½ teaspoon vanilla extract
¼ cup mild-flavored molasses* (sometimes called ‘light’ molasses)
1 large egg, at room temperature
Coarse or Granulated Sugar for topping, Optional


Directions:

1. In medium bowl, stir dry ingredients together with fork.
2. In separate large bowl, or bowl of an electric mixer, mix butter on medium speed until light and airy. Add in sugar and mix until silky in appearance. Scrape down side of bowl and mix until combined.
3. Add in egg, molasses and vanilla. Mix to combine.
4. Spoon in dry ingredients while mixing until thoroughly combined.
5. Half the dough into two portions equal in size. Lightly flour surface and separately roll each into logs, approximately 2-inches around. Pat in ends to even out.
6. Separately wrap each log of dough in plastic and refrigerate or freeze until firm to touch.


When ready to Bake:

8. Preheat oven to 350 degrees F. Using parchment paper or silicone liner, line two large cookie sheets.
9. Add coarse or granulated sugar to bowl (if using sugar). Using sharp knife, slice 1/4 inch dough for each cookie. Press one side of each cookie into sugar firmly. Place sugar-dipped cookies onto lined cookie sheets, two-inches apart, sugar-side facing up.
10. Add pans to oven and bake 10-14 minutes, or deep-golden in color. Turn pans halfway through so cookies are evenly baked.
11. Allow cookies to cool for two minutes before transferring to cooling rack with spatula.

Wrapped well, dough can be refrigerated for as long as five days, or frozen for three months. Store cookies in air-tight container.

Friday, September 17, 2010

The Y-Word & Harvest Squash Bread


Since making Soft Pretzels for the first time several months back, which required the use of yeast, I've been having fun finding and making as much use of it as possible. Though I don't blog about it nearly as much as I use it. I figure 'tis the season to change that.

I, like a lot of people, was tentative to start, having heard the lore about how difficult yeast is to work with. I now stand convinced, the bread makers, along with the pie crust and the cheese makers have been working in collusion for years to create and propagate fear in the minds of would-be at-home cooks to keep us buying their products. If they knew that we figured out how relatively easy to make, and delicious their homemade counterparts were, those companies would be in BIG trouble.

Okay, so maybe we wouldn't spend our days and nights in the kitchen kneading dough and bringing milk to temperature in lieu of a store-run, but we would think twice about where our food comes from; What's in it, how it gets to our home and eventually our plate.

I'm all for a revolution on the matter! Now, I'm not going to start it, or plan for it. I'm not that organized. But I will attend and bring snacks. I might not even attend if it's before noon. Or if this is going to require a lot of walking. Or shouting. I don't like loud noises. Or sticks and throwing things. Hey, hey, Let's not get crazy here.

Okay, so maybe a revolt was a bad idea. How about we all just commit to try making something with yeast at least once if you haven't already, as a fun weekend project, some time after noon, in the quiet and peace of your own home.

This dense, chewy, nutty, earthy bread is my 6th and favorite hitherto. I've had it with butter, and then peanut butter, and toasted for breakfast this morning.
*Update: This bread makes the BEST peanut butter & jelly sandwich I've EVER had.

Harvest Squash Bread

Recipe courtesy and adapted from Cookingbread.com


Ingredients:

Squash Ingredients:

1 acorn squash
2 teaspoon butter
2 teaspoons brown sugar
4 tablespoons maple syrup

Day before Ingredients:

1 1/4 cups whole wheat flour
3/4 cup lukewarm water
1/4 teaspoon instant yeast

Day of Ingredients

2 3/4 to 3 cups whole wheat flour
1 cup mashed squash ( above )
2 teaspoon instant yeast
1 1/2 teaspoon salt
1/4 cup water
1 Teaspoon Maple Syryp
1/4 cup flax meal (Ground Flax)
2 tablespoon flax seeds

*Total yeast will be one packet if using packet.


Method:

Cut acorn squash into half, lengthwise. Remove seeds with spoon. Using a fork, make holes around interior of the squash.

Preheat oven to 350 degrees F.

Place squash onto parchment-lined cookie sheet (one with sides), or baking dish. Add piece of butter to each half of squash. Divide between two halves of squash, brown sugar and maple syrup. If using baking dish, add an inch or two of water to pan.

Add pan with squash to preheated oven and bake 1 hour or until squash feels soft when inserted with fork. If there are any juices remaining in squash, carefully pour into small bowl and reserve. Scoop inside of squash into separate bowl, reserving 1 cup, and mash with fork. (This can be done day before along with "day before" mix).


Using wooden spoon, add "day before" ingredients and mix together. Cover with plastic wrap and leave on counter or stove-top for 12-16 hours, or overnight.


12-16 hours later, or the next day, add mashed squash, water, 2 tablespoons maple syrup, reserved juices from baked squash (if any remain) and remaining yeast to "day before" mixture with wooden spoon, mix until smooth. To this, add flax meal and flax seeds. Mix until combined well.


Add salt to 2 3/4 cups whole wheat flour and combine with fork. Add half of whole wheat flour to mixture and stir until smooth. Slowly add in remaining flour 1 heaping tablespoon at a time. When mixture becomes too difficult to mix, scrape out onto flat surface. Mixture will appear very dry. You may add a little water if needed, but remember that as you knead and squash is incorporated, mixture will become sticky. (Which is what you want.)

Knead dough for 8 minutes. Add in remaining 1/4 cup flour if needed.


After kneading, place kneaded dough into lightly oiled bowl. Turn to coat dough. With plastic wrap, cover bowl and leave to sit on counter or stove top for 1 & 1/2 hours or until doubled in size. Keep bowl in place with no drafts.


Press to release gas from dough and remove from bowl. Divide into 2 equal parts. Form each half into round dome-shaped balls. Line large cookie sheet (or two small) with parchment paper and sprinkle with cornmeal (if using cornmeal, optional). Place each ball of dough, several inches apart, onto lined cookie sheet. With plastic wrap, cover and allow to double in size, approximately 1 hour.


Preheat oven to 375 degrees F. Remove plastic wrap. Using sharp/serrated knife, score bread by making an X-shape into dough. Using egg white that's been beaten until foamy or melted butter, brush tops of dough. (Bread will have a sheen and flax seeds will stay on better after baked if brushed with egg white, but I prefer the flavor of butter.) Sprinkle tops of dough with flax seeds.


Place bread into oven on cookie sheet or baking stone.

On bottom rack inside oven, add cast iron skillet or small baking dish. To skillet or dish add 1 cup of water and close oven door. This will create steam.

Bake 30 minutes or until bottom of loaf sounds hollow when tapped, and tops have lightly browned.


Tuesday, September 14, 2010

Same Time This Year & Brown Rice Pudding


This time last year I was myself preparing for the arrival and meeting of, who would come to be, the most wonderful man I know and love of my life, just weeks from then. And now, here again, I find myself in the same place, waiting--My Love just weeks away. Only this time, I'm a lot less nervous and relishing the eager anticipation. I've been trying to keep myself busy: cooking, recipe hunting, reading, P90X workouts, watching the leaves change color, just to prevent myself from spontaneously combusting.

Finding comfort helps to pass the time. Fall always puts me in the mood for things that make me feel warm; Socks with cats wearing scarves, Henri Bendel vanilla bean & fig candles, the smell of freshly grated nutmeg, something simmered to creamy perfection and delicious, like brown rice pudding. The epitome of this glorious season in a bowl, until it's his arms that are warm and comforting around me.

Je t'aime, Babi. See you soon.


Brown Rice Pudding

Recipe courtesy and adapted from Joythebaker.com

Ingredients:

4 cups water
1 cup brown rice (About 3 cups cooked)
1/2 teaspoon salt
2 Tablespoons butter
4 cups whole milk
(Yes, you can use almond milk instead)
2 Tablespoons Plus 1 Teaspoon dark brown sugar
2 Tablespoons honey
1 Teaspoon Vanilla Extract
1/2 vanilla bean, split open and scraped (Optional)
1 cinnamon stick
A Pinch or 2 of ground nutmeg
A Pinch or 2 of ground allspice
1/2 cup dried sour cherries (or raisins, or whatever fruit you'd like)


Directions:

In strainer, run cool water over brown rice. Place aside.

To medium/large sauce pan, add 4 cups of water and bring to boil. Add in brown rice and salt. Reduce heat to medium and allow rice to simmer uncovered for 30 minutes. Occasionally stir. Once your rice is cooked, pour water and rice into strainer (or colander), allow rice to sit in strainer for 10 seconds. With heat turned off, pour rice back into the same pot it was cooked, place cover on top and allow to steam for 10 minutes.

Gather the rest of your ingredients.

After 10 minutes, put rice in a bowl and set aside. To saucepan, add 4 cups milk, brown sugar, honey, cinnamon stick, nutmeg, allspice and vanilla bean to pan. Turn heat to medium and allow milk to come to very low boil. Stir frequently to prevent burning.

Add in cooked rice, butter and raisins or cherries. Turn your heat down between medium and low. Stir and continue to stir frequently until milks reduces and is mostly absorbed by rice, approximately 30 minutes.

Transfer rice to a large bowl and smaller individual serving size bowls. Refrigerate or serve at room temperature. Store refrigerated.


Thursday, September 9, 2010

The Break-Up Letter & Peach-Berry Pie


Dear Summer,

We've spent a memorable three months together. We had a great time watching fireworks on the Fourth of July.You worked so hard to make My 31st Birthday special. And I'll never forget seeing Cirque Du Soleil for the first time with you right there. During the past month or so, I think it's become glaringly obvious to the both of us it's just not going to work out.
In short, your hot temperament is too much for me and more than I'm willing to deal with. I deserve better than drudging through the swelter of your unpredictable tantrums.

I've taken the liberty of packing your things: Flowy skirts, those sandals that show off your freshly pedicured toes, and the straw fedora's you love so much.

I know you've heard it through the grapevine, and yes, it's true, Fall and I have rekindled our romance. The truth is, I never stopped thinking about him; His bright and colorful personality, The way he smells like maple in the morning, that butternut squash dish he makes that tastes like home... He's so thankful and giving.

This may sound cruel, but Summer, so were you!

To show you there are no hard feelings, I made this delicious pie to take with you on your way out. It's Peach--your favorite.


Sincerely,

--Ree


This is my second pie. Since baking the first pie: Here, I fortuitously learned a trick for making no-fail pie crust every time. This is a by-product of a failed attempt at waffle cones (sans a waffle maker) when I made Coffee Cannoli Ice Cream last month.
The method utilizes wax paper and can be used for crust, cookies and anything else that's difficult to roll out without sticking and breaking.


Peach-Berry Pie

Recipes courtesy and Adapted from Joy of Baking and
What's Cooking America

Ingredients Peach Filling:

5 cups fresh peaches (I used about 11 peaches)
1 Cup Sliced fresh Strawberries or Raspberries
1/2 Cup Plus 2 Tablespoons granulated white sugar
3 tablespoons quick cooking tapioca Or corn starch
2 teaspoons fresh lemon juice
1/8 teaspoon salt
1/8 teaspoon cinnamon
1 tablespoon (unsalted butter, cut into small pieces

Garnish:

1 tablespoon cream or milk
Granulated white sugar


'P' is for Peach.


Shortening-Butter Crust:

2 1/2 cup all-purpose unbleached flour, plus extra for rolling
2 teaspoon salt
3 tablespoons granulated sugar
1/2 cup Plus 1 teaspoon chilled vegetable shortening
1/2 cup cold unsalted butter, cut into 1/4-inch pieces
6 to 8 tablespoons ice water

Tools:

Rolling Pin
Wax Paper

To Sprinkle over bottom of crust before adding fruit:

Mix together 1 tablespoon each, flour and granulated sugar. This will help prevent pie filling juices from soaking through bottom of crust.

*Serve pie with softly whipped cream or Vanilla Ice Cream.

To Make Crust:

In standard sized food processor, or large bowl, process, or mix with hand mixer, flour, salt and sugar until combined. Add in shortening and process or mix until mixture resembles coarse sand, approximately 10 seconds. Add pieces of butter over flour mixture and process in 1 second pulses, or mix, turning hand mixer on then off, until pieces of butter are no bigger than small peas. Add 6 tablespoons ice water to mixture and, using a rubber spatula or hand mixer on low, fold in, or mix until just combined. Pinch dough with fingertips to be sure it sticks together, If not, add an additional 2 tablespoons ice water. Do not process or mix more than 30 seconds.
Turn dough onto work surface and gather into ball. Divide dough in half and flatten each into a round disk-like shape. Cover each with plastic wrap and refrigerate at least 1 hour before using.

After an hour, remove one round of dough from refrigerator. Measure out and lightly flour two equal pieces of wax paper. Place dough, in center, between two pieces of wax paper, begin to flatten round of dough with rolling pin. Give wax paper square a quarter turn after each roll. Roll dough two inches larger than inverted pie plate. (Place pie plate, upside down, over dough to make sure it's big enough.) Carefully remove only top layer of wax paper. Turn remaining wax paper holding dough, so that the dough is facing down, into pie pan. Make sure dough is even in pan. Carefully remove second piece of wax paper, which should be bottom side up. Brush off excess flour. Roll hanging dough under itself to crimp or cut off excess. Cover and refrigerate for 30 minutes. Reserve both pieces of wax paper and repeat process of rolling with second dough round, only this time, leave rolled out dough in wax paper and refrigerate until needed.

Immediately start making pie filling.


To Make Peach Filling and Construct Pie:


To easily remove peach skins, set a large pot of water to boil. Add peaches to boiling water for 30-60 seconds, after 30-60 seconds remove peaches and immediately put into an ice bath (large bowl of ice water). The skin of the peaches should easily peel off by rubbing. Slice peaches in half to remove stone. Cut each half into slices.
Mix together sugar, tapioca OR corn starch, lemon juice, lemon zest and cinnamon in small bowl. In large bowl, add sliced peaches and strawberries or raspberries. Pour sugar mixture over peaches and toss or use spoon to gently combine. Cover and let stand at room temperature for 30 minutes.

Preheat oven to 400 degrees.

After bottom half of dough has been refrigerated in pie plate for 30 minutes, sprinkle bottom crust with mixed tablespoon each, flour and sugar mixture.
Add peaches that have been sitting for 30 minutes to prepared pie shell.
Brush edges of dough with cream. Remove flattened top crust from refrigerator. Carefully remove one layer of wax paper. Lift wax paper and turn pie crust over onto top of pie. Carefully remove second layer of wax paper. Roll hanging dough under itself to crimp or cut off excess. Cut slits around top of pie to allow steam to escape.
Brush top of pie with cream and sprinkle with granulated sugar. Place constructed pie onto cookie sheet and bake for 45-60 minutes or until top of pie is completely golden brown in color.


Sunday, September 5, 2010

Cirque Du Soleil & Lemon Lavender Sables


Last Saturday, I know, I know--a whole week ago! I finally had the opportunity to fulfill one of my dreams and see a performance by Cirque Du Soleil. I was thrilled when I found out they would finally be coming to Boston. In the months leading up to my birthday, I dropped some not-so-subtle hints to Daph about how much I wanted to see the show, something he already knew. But this show in particular, 'Ovo',' which means 'Egg' in Portuguese. The story is told through the eyes of insects. The premise of the story revolved around the search for this 'Ovo', and the love story between two bugs.

I've long been fascinated by a bugs life, and creatures too small too matter in any significant way until you're bitten or find yourself swatting at one that's buzzing around your head. If you read my birthday post, you already know that Daph got me a ticket to the show for my birthday.

As this was my first Cirque Du Soleil experience, I haven't any other of their shows to compare it to. I loved it. Despite being there alone on, what was apparently "couple's night", I was very close to the stage, so it was easy to get caught up in the magic. One of my favorite things is how interactive the show was.
From the moment we entered the big top we were greeted by men wearing bee keeper uniforms who searched us all for bugs. Throughout the show different cast members would come into the audience which made you feel a part of the show. I laughed out loud. I was drawn in by the acrobats, synchronized balancing performances, costumes and, what could only be described as, a gravity defying use of bodies.
A headstand on the seat of a unicycle while riding back and forth on a rope suspended in the air, Really? Wow!

Being part Portuguese but growing up in an English speaking home, I also had a special appreciation for the music, which was all sung with a live band playing background, in Portuguese.

During intermission we were treated to a 10-minute fireworks display that was pretty spectacular. But I always find fireworks spectacular. Not sure if that display is something that takes place often over Boston's New Waterfront or not. Nonetheless, I really appreciated it.
At the end of the show all of the cast members came out onto the stage to sing, dance and take their bow. Everyone cheered the masterful performances while gold and orange butterflies rained down on the stage and first few rows of the audience.


With my handwritten directions from google maps to guide me, I headed down Seaport Blvd., over the bridge, by foot.


In the distance I spot what appears to be a blue and yellow big top. Cirque was set up to look and feel like a traditional circus.


Finally! Running a few minutes late, so no interior shots, but I made it.


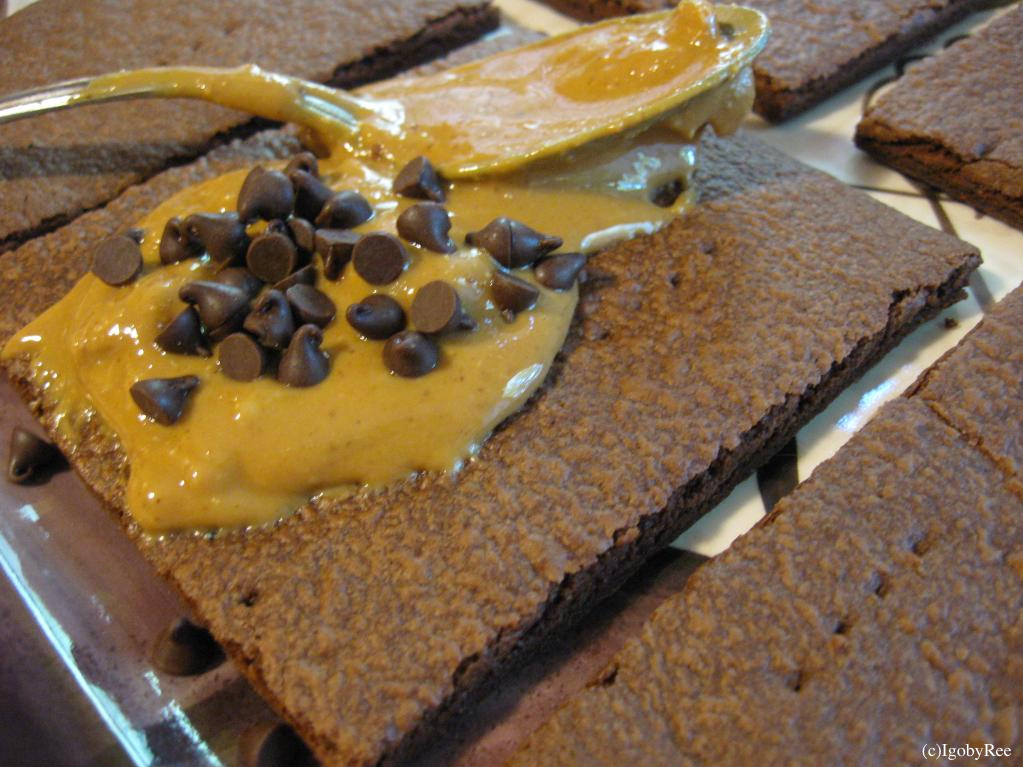
*This recipe is essentially Joy the Baker's Citrus Sables which I've blogged about Before. I adapted the recipe by omitting the lime, doubling the lemon, adding extract and lavender (flowers, buds and sugar).


Lemon Lavender Sables (Suh-Bleez)

Recipe courtesy and Adapted from Joy the Baker

Ingredients:

2 sticks (8 ounces) unsalted butter, softened at room temperature
1/2 cup granulated sugar
1/4 cup confectioners’ sugar, sifted before measuring
1/2 teaspoon salt, preferably sea salt
2 large egg yolks, at room temperature
2 cups all-purpose flour
1-2 Teaspoon(s) culinary lavender (dried is fine)

Zest of 1-2 lemons, Two teaspoons
1 teaspoon lemon extract


To Finish:

Dust cookies with confectioner's sugar (Powdered sugar)

Directions:

1. Using a mixer fitted with paddle attachment or hand mixer, add butter to bowl and mix on medium speed until light and creamy. In small bowl, add sugar and, using your fingertips, rub lemon zest into sugar. Pour granulated sugar and sifted confectioner's sugar, salt and lemon extract to bowl with creamed butter, mix on medium speed until until smooth and satiny, about 1 minute. Reduce speed to low and mix in egg yolks one at a time, mix until blended.

2. Turn mixer off, In medium bowl, add lavender and flour, mix with fork, Add flour to bowl with creamed butter and other ingredients. You may want to partially cover bowl with clean dish towel before proceeding to next step. Once flour is added, pulse mixer five times on low speed for 1 to 2 seconds. Remove towel. If flour remains that has not incorporated, stir to incorporate for about 30 more seconds. You want the dough to be moist throughout, and soft, but remain clumpy.

3. Lay plastic wrap over clean, flat surface. Scrape dough out of bowl onto work surface. Gently work dough into ball, If making shapes with cookie cutters form dough into ball and flatten, cover with plastic wrap and refrigerate until ready. If slicing round shape cookies form dough into ball then cut into two equal parts. Shape each divided half into log shape. Wrap both logs individually, using two separate pieces of plastic and place in refrigerator to chill for no less than two hours. Dough can be stored in refrigerator for 3 days or kept frozen for 2 months.

4. Preheat the oven to 375 degrees For Cookie Cutter Shapes OR, 350 degrees For Round Shape. Use parchment paper to line baking sheet.

5. For cookie cutter cookies: Remove ball of dough from refrigerator and unwrap plastic. Place dough onto wax paper. Roll out ball of dough to between 1/2 & 1/3 thickness, cut out shapes using cookie cutters.For round shape cookies: If edges of log are not smooth, trim off so log if uniform in size and shape from end to end. Slice cookies to 1/3 inch thickness.

6. Leaving an inch of space between each cookie, place cookies on baking sheet and bake for Cookie Cutter Shapes, 10-13 minutes OR for Round Cookies, 17 to 20 minutes. Turn baking sheet around halfway through baking. Once baked, cookies will be light golden brown around edges, even lighter on top and golden brown on the bottom. Allow cookies to cool on baking sheet for 1 to 2 minutes before using metal spatula to transfer cookies to cooling rack.
Once baking sheet has cooled completely repeat same process with second log of dough if using now.

7. If dusting cookies with confectioner's sugar, allow cookies to cool completely. Place cooled cookies on wax or parchment paper and lightly sift with confectioner's sugar.


Butterfly and Ovo shaped cookies cooled and ready to be shared.


Related Posts with Thumbnails