Saturday, August 28, 2010

The Swell Season, Tomato-Feta Pasta Salad & Growing Things: Update


There are few things I love more than fall in New England. Being a mere 27 days away from it, I can barely contain myself! September brings the start to three months of unadulterated magic.
Oh sure, there's nothing like the bite of your first summer tomato grown in a pot (or from the ground) in your own yard, and other seasonal fruits and vegetables sprung from the same earth you call home, sweetest under the surrender of sun. I would never argue that. However, for me, that's where the allure of the burning season ends.
Only weeks away from the season where, leaves, in a final act of rebellion against their inevitable fall, rage into red, yellow and orange, and fade into the ground from which they began only to be reborn into spring two seasons from now, I am antsy. I am impatient with eager anticipation.
Nothing...NOTHING is more exhilarating than the wind dancing; The air, fig and harmony upon the dawn of winter; Perfume, thick and pregnant with glowing maple. September, October, if I should ever have a daughter I will name her 'November'. The swell season is nearly here. The commencement of once and sometimes twice daily workouts--something I dread in the summer but adore come fall. And the return of *Jason Mraz Sunday's. Sing. Dance. Eat. Rejoice!

*Jason Mraz Sunday's are characterized by dancing and singing along to Jason Mraz's entire discography and are primarily exclusive to Sunday's. During which time phone calls are not responded to. Sometimes ice cream may be involved.


Tomato-Feta Whole Grain Pasta Salad
Recipe Courtesy and Adapted from Ina Garten

I was excited to use the Homemade Feta from Last week's Post, Here, and home grown basil, parsley and cherry tomatoes to make this very tasty salad.


Ingredients:

1/2 pound fusilli (spirals) whole grain pasta (or white) (I started with two cups dry)
Kosher or Sea salt
Good olive oil
1 pound ripe tomatoes, medium-diced
3/4 cup good black olives, such as kalamata, pitted and diced
1 pound good feta cheese, medium-diced (I used homemade)
6 sun-dried tomatoes in oil, drained and chopped


" For the dressing:

5 sun-dried tomatoes in oil, drained
2 tablespoons red wine vinegar
6 tablespoons good olive oil
1 garlic clove, diced
1 teaspoon capers, drained
1 teaspoon kosher salt
3/4 teaspoon freshly ground black pepper
1 cup freshly grated Parmesan

1/2 cup packed flat-leaf parsley, chopped
1/2 cup sweet basil, thinly sliced

Directions:

In large pot of boiling salted water, add 1/2 teaspoon olive oil and pasta. Cook until al dente, or to your liking. Pour into colander to drain and set aside to cool.
In large bowl, add cooled pasta, tomatoes, olives, feta and diced sun-dried tomatoes.


" For Dressing:

In food processor, add sun-dried tomatoes, vinegar, olive oil, garlic, capers, salt and pepper and, process until combined and tomatoes are broken up. Add dressing to pasta along with basil and parsley, and gently stir until completely combined.


Growing Things

Maybe some of you will recall my first Growing Things post, Here. This year we planted fruits and vegetables, a lot of which were new to us, and had very good success despite transplanting some things late in the season and our unfamiliarity with other things.

One morning last week I opened my front door and was greeted with a surprise, not only had one of the lavender sprigs grown four inches, but it also bloomed.


In Growing Things One, Here, these cucumbers looked hopeless. I transplanted and showered them with love. They gratefully recovered and grew strong and delicious.


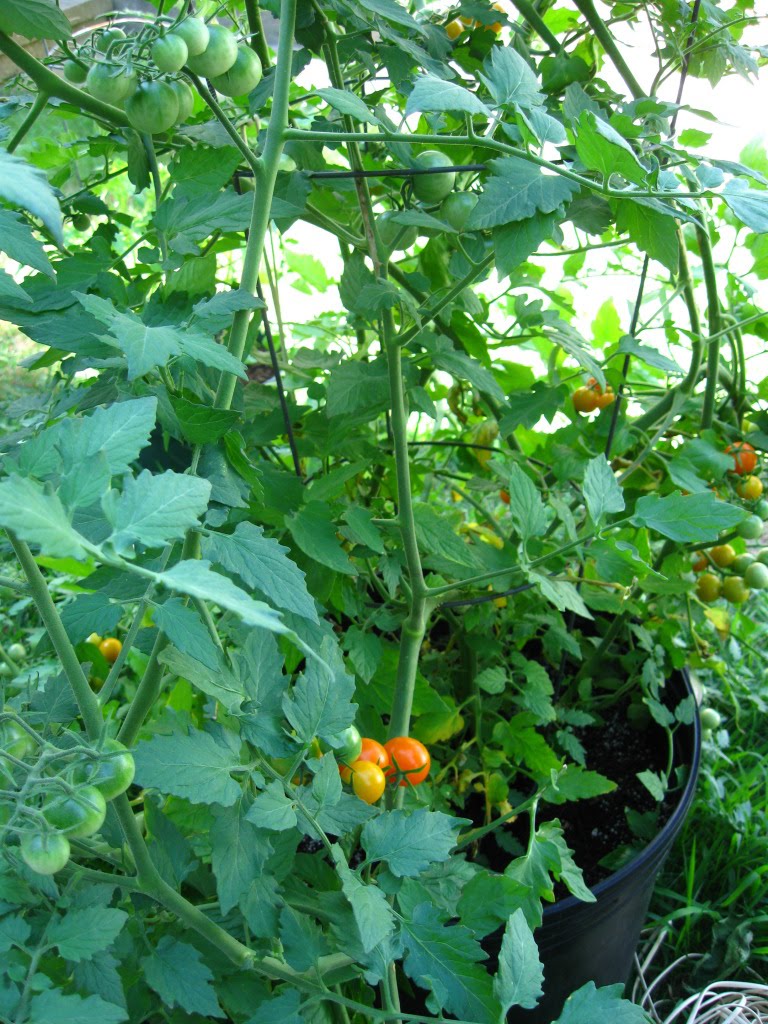
In addition to plum tomatoes, we also grew yellow cherries. They were sweet and the tastiest tomatoes I've ever had.


The flesh of home grown bell peppers is usually thinner and the taste is more vibrant than most of their store-bought counterpart.


Everyday I would treat myself to freshly picked strawberries as I gardened.


Though the jalapeno's weren't transplanted until late in the season, we're going to get at least one good batch.

Saturday, August 21, 2010

Homemade Feta & Food 'n Flix


This month, after dipping my toes into the proverbial "kiddie pool" by making (what was almost too easy) Ricotta Cheese, I was feeling adventurous enough the attempt Feta cheese. And with the help and guidance of Heather over at Girlichef, who is a self-proclaimed "cheeseslut," and member of the fabulously inspiring team behind Forging Fromage, I knew I was in good hands. However, being as stubborn as I am...There, I said it. I stubbornly ventured to go-it alone and, to no surprise, wasn't very successful. My first attempt resulted in what's known in the cheese making world as a "bad batch," and an entire gallon of milk going down the drain.
The following day I was left with a half gallon of milk--enough for a half batch, new resolve, some valuable lessons learned and a willingness to try again. I reserved a couple of the tips I found helpful from other blogs and web sites, but stuck, for the most part, to just one recipe.
This time, I successfully made my very first piece of feta, albeit half the size I originally intended. I was, nonetheless, very proud.

I won't let you make the same mistakes I made.

1. Don't panic! Trust the process and stay the course.

2. Sterilize your equipment; Fill the the pot you're using with water, add measuring cup, spoon, knife and boil for five minutes. Carefully drain water from pot along with your tools. 30-60 minutes before cutting and draining cheese curds, boil cheese cloth in smaller pot. Drain, allow to cool enough to handle and squeeze out the excess water. Line colander with a double or triple layer damp cheesecloth.

2b. Wash surfaces with warm soapy water: Counter/ Table, your hands before handling cheese.

3. Some web sites suggest cutting the feta into slices (like I did), before salting, but to prevent over salting, only cut the feta in half. That's what I'll do next time.

4. Don't be discouraged; Anything you attempt for the first time (or 2nd or 3rd, in some cases) is bound to have some kinks. It's important to exercise patience and know that practice will pay off.

5. Let's do this!

Feta Cheese

Recipe courtesy and Adapted from Girlichef, via 'The Home Creamery' by: Kathy Farrell-Kingsley

Tools:

Ultra-fine cheesecloth (Or butter muslin, Or sterilized unused hankerchief)
Table (butter) knife
Measuring Cup
Slotted spoon
Dish/Bowl that can hold feta and be covered

Ingredients:

Yield: 1 lb. Make at least 24 hours before needed.

1 gallon milk
1/4 c. cultured buttermilk (Or 1/2 cup plain low-fat yogurt with live cultures)
1/4 tsp. liquid rennet (or 1 half rennet tablet)
1/4 c. cool water (55-60 degrees F)
1/4 tsp. calcium chloride
coarse salt

*Note: I subtracted 1/4 cup milk from the gallon I was using to make homemade UN-cultured buttermilk (made with vinegar)and, much to my surprise, it worked out just fine.


This is what a clean break looks like.


After cutting lengthwise and crosswise into 1-inch squares.


Stir to break curds and carefully pour into cheesecloth.


1. In large heavy-bottomed pot, heat milk to 88 degrees over low heat. Stir occasionally to prevent milk from scalding. Heating milk to correct temperature will take about 10 minutes. Once the milk has been heated, stir in buttermilk OR yogurt. Place cover over pot and turn heat off. Leave pot undisturbed for 1 hour.

2. Either, break up to dissolve tablet or stir liquid rennet into cool water. Pour this mixture, and calcium chloride into into milk mixture. Stir for 60 seconds to dissolve. Milk will still be warm. Return cover over pot and allow to sit undisturbed for 1 to 3 hours, until coagulated. Mine took 3 hours.

3. After one hour, You can test for a "clean break" by inserting a very clean finger; Dip little (pinky) finger about 1-inch into coagulated mixture and pull up. If finger removes clean and liquid (whey) pools, you have a clean break. If not, allow to sit for another 2 hours.

4. Starting lengthwise and then crosswise, insert sterilized blade of table (butter) knife to cut curds into 1-inch squares. Stir mixture gently 3 or 4 times to break up curds. The temperature should still be at 88 degrees. Mine was not, so I turned the heat to low and allowed mixture to come to temperature. Turn heat off.

5. Place colander in a large bowl. Slowly pour curds into ultra-fine cheesecloth (or butter muslin) lined colander. Use a tool, such as a wooden spoon, to lay across colander and make a "bag" by tying the four ends of ultra-fine cheesecloth over the spoon, so that the bag is suspended higher than the liquid (whey) that is being released. At this point, a lot of the liquid should have been released. Temporarily place colander into clean sink. Transfer liquid remaining in bowl to a smaller bowl that can be covered and refrigerate. This will become our brine. Return colander to bowl, adjusting so that the ends of spoon are laying flat on either side of colander (or bowl). You could add folded dish towels to each side of the bowl and lay ends of spoon securely on towels for more height, if needed. Refrigerate cheese until drained, approximately 4-6 hours.

6. After 4-6 hours, remove bowl with cheese from refrigerator. Wash hands before handling cheese. Untie cheesecloth and remove ball of cheese. Yes, it's exciting and looks delicious, but don't eat it...yet.

7. Cut the ball of cheese evenly down the middle, giving you two halves. Transfer cheese halves to something that can be covered, such as a baking dish. Salt the entire surface of both halves of the cheese and cover dish. Allow dish to sit out at room temperature for 24 hours. I was skeptical, too, but trust me.

8. 24 hours later, you'll have cheese that is sitting in the liquid that has been drawn out by the salt. Carefully drain excess liquid; Salt surface of the cheese once more and cover dish. Allow cheese to sit at room temperature for 2 more hours.

After all the hard work and patience, you can eat your cheese now or, Stir in 3-5 tablespoons of salt to the brining liquid we reserved earlier and add pieces of cheese. Cover and refrigerate up to 4 weeks.

*Note: If you accidentally threw the brining liquid away (this happens), simply cover cheese with water that you've salted, cover and refrigerate.

Once you've removed the cheese from the cheesecloth, only cut mound into half and NOT into slices like I've done below. This will help prevent over-salting.


After 24 hours, the salted cheese will be sitting in a pool of water. Heather had a lot of water, but I only had very little. That's okay! This was just after salting.


After a full night and day, your cheese is ready to eat.


Food 'n Flix

At the start of this post I mentioned Heather over at Girlichef, who guided me through my cheese making endeavor. Well, Heather has started a new blog called Food 'n Flix and was so kind to ask if I would co-host it with her. The premise is, once a month we'll feature a film that relates to food, either directly or indirectly, watch the film, and prepare a dish or dessert inspired by that month's film. Our first month is September and we'll be starting with the film 'Chocolat' starring Juliette Binoche and Johnny Depp. That means chocolate is the star ingredient. The best part is, everyone is welcome to join in and participate. We'd love to have you over to share in ideas, dishes, movie suggestions, and what's sure to be a lot of fun.

Food‘nFlix

Tuesday, August 17, 2010

Self Said & Corn and Black Bean Salad


On Sunday, Coming back from the grocery store, I enter my home through the back door (which is the kitchen), My grandmother practically rushes to greet me and I notice she's wearing a sheepish grin. Without being prompted, she proceeds to tell me that while I was gone she came into the kitchen and opened the refrigerator door to get some bean salad. She told me she said to herself: "Self, Terri(anne) wouldn't like you not leaving any for her." So, she closes the refrigerator door and walks away. She tells me that after a second conversation with herself 30 minutes later, which went something like: "Self, Terri(anne) is always complaining about you not eating healthy or getting enough protein, so I think she'd want you to eat the bean salad," She returned to the kitchen to get a bowl of the salad for dinner. She was quite proud of herself as she was telling me how she finished nearly all of it. "Self made me do it," She insisted. In truth, I was happy my grandmother (and Self), who is adverse to trying anything new and rarely eats salubriously, loved the salad so much.
For dinner, I also prepared myself a bowl of what little was left. As I was walking by my grandmother with the bowl of salad, she yells at me: "DID SELF SAY YOU COULD HAVE THAT?!"

She was also kind enough to relay a message where 'Self instructed me to buy all the ingredients I need to make this again when I go to the store this week.' Self is bossy. Hopefully she'll share better next time.

This was delicious! Just ask Self.

Corn and Black Bean Salad with Basil- Lime Vinaigrette
Recipe courtesy and Adapted from Giada De Lauretiis

Ingredients Salad:

2 ears fresh corn or 1 cup frozen corn, thawed
1 &3/4 Cup Black beans, prepared, Or (15-ounce) can black beans, drained and rinsed
1 & 3/4 Cup Garbanzo beans, prepared, Or (15-ounce) can garbanzo beans, drained and rinsed
1 red bell pepper, cored, seeded, and cut into 1/2-inch pieces
1 mango, peeled, seeded, and cut into 1/2-inch pieces
1/2 small red onion, chopped
1/2 jalapeno, finely chopped
1/2 cup chopped fresh basil leaves (I used a mixture of Sweet and Thai basil)

If starting with raw beans, salt the beans before preparing the salad.

It's more work, but I always start with raw beans.


" Vinaigrette:

*Note: The original recipe called for adding the basil to the vinaigrette, but I thought it would be easier just to add it in with the salad.

2 limes, zested and juiced
2 tablespoons balsamic vinegar
1 Clove garlic, finely chopped
1 teaspoon ground cumin
1/3 cup extra-virgin olive oil
Sea or Kosher salt and freshly ground black pepper


Directions For the salad:

Indoor Method: Place skillet pan over medium heat. Add enough canola oil to coat the bottom of the pan. Remove silks and husks from fresh corn. Remove corn kernels from cob and add to heated pan. Saute for 8 minutes, stirring occasionally. Remove from heat and set aside.


Outdoor Method: Preheat outdoor grill. Peel down, but do not remove corn husks. Pull off silks and discard. Return corn husks to cover corn. Add prepared corn to a large bowl of cold water to soak for 30 minutes. Remove corn from water, shake to remove excess water or pat dry with clean towel. Grill corn for 10-15 minutes. Remove corn from grill and allow to cool. Remove husks and, using a sharp knife, hold corn upright and cut down to remove corn from cob.

In large bowl, add garbanzo beans, black beans, corn kernels, red bell pepper, mango, red onion, jalapeno and scatter basil over top.


" For the vinaigrette:

In a small bowl, add zest and juice of lime, balsamic vinegar, chopped garlic, and cumin. Whisk while slowly incorporating the oil until mixture thickens. Season to taste with salt and pepper.

Add vinegar over-top of bean salad and mix well. Cover and refrigerate for 1 hour. Mix again before serving.

Wednesday, August 11, 2010

Homemade Ricotta & Coffee-Cannoli Ice Cream


Do you remember Strawberry Buttermilk Ice Cream, HERE, Or Chocolate-Walnut Fudge Cake, HERE, When we made our own buttermilk using lemon juice (or vinegar, as it were)? Well, homemade ricotta cheese is essentially buttermilk, in that, it begins by using the same process, but is heated to cause a reaction producing more curd (The solids that separate from the whey; liquid). You don't need any particular skill set, I.E. Cooking acumen, an ability to decipher and follow directions, a knack for keeping measurements straight...The latter two of which I'm spectacularly bad at. With only a few ingredients and simple steps, ANYONE can do this.

Add milk, cream, heat, stir, keep stirring, boil. Add lemon juice (or vinegar), stir gently as the curds (solids) separate from the whey (liquid). Remove from heat, cool, drain, done! The whole process takes about ten minutes. That's it.

You do not need any special equipment, like a thermometer. And if you have a fine mesh strainer (Or clean, preferably unused plain white t-shirt), you don't even need the cheesecloth.


Homemade Ricotta Cheese

Recipe Adapted from Eggs On Sunday And Gourmet on Epicurious

Note: I misread the measurements and doubled the amount of heavy cream to 1 cup and the lemon juice to 3 tablespoons, but it was absolutely delicious; creamy and perfect for desserts. This yielded me 2 and 1/4 cups Ricotta cheese. The original source for the recipe says it yielded 1 cup. If your yield is less than the amount needed for the ice cream recipe, simply make up the difference by adding more half and half or milk.

Ingredients

1 quart whole milk
1/2 cup heavy cream
1/4 tsp coarse salt (kosher or sea salt)
1 1/2 tablespoons lemon juice

*This recipe doubles easily.


Place colander or fine mesh strainer over large bowl, line colander with fine mesh cheesecloth. Set bowl aside. In separate small bowl, measure out lemon juice, set aside. In large heavy bottom saucepan, pour in milk, cream and add salt. Turn heat on between medium and high. Allow milk to come to a simmer while stirring consistently. Continue stirring occasionally to prevent the milk from scaling on the bottom of the pan.

When milk begins to come to a gentle (not rolling) boil, add in lemon juice and gently stir as the curds (solids) separate from the whey (liquid). Reduce heat to low and stir gently for another two minutes. Remove pan from heat. Allow to rest and cool for twenty minutes before draining. Once cooled, pour mixture into lined colander that's been placed over bowl. If the liquid that has drained is so much that it has risen and the cheesecloth is sitting in liquid, remove colander from bowl, empty liquid into sink, place colander back into bowl and continue to drain for 1 hour. If your liquid hasn't risen over the cheesecloth, proceed by allowing liquid to drain into bowl for 1 hour.

Note:If your milk starts to boil over, it's okay to remove pan from heat briefly, just until bubbling reduces. Reduce heat to low, add lemon juice and continue to stir gently over heat for two minutes.


Store ricotta in an air tight container for up to two days; refrigerated.


Coffee-Cannoli Ice Cream
Recipes' inspired and Adapted from Giada De Laurentiis And Canela Kitchen Recipes

Ingredients

1 & 3/4 cups homemade ricotta cheese
1 cup whole milk
1/2 cup half and half
1 cup coffee simple syrup, recipe below
1 teaspoon vanilla extract
1/2 Bourbon Madagascar vanilla bean, Scraped (Optional)
1/2 Cup semi-sweet mini chocolate chips

In large bowl, whisk together ricotta, milk and cream until completely blended. To this, add in coffee simple syrup, vanilla extract, and vanilla bean caviar. Stir until blended. If you have an emulsion blender, blend this mixture until completely smooth. If not, stir until as smooth as possible. Pour mixture in air tight container and refrigerate until cold. Once mixture is cold, carefully pour into ice cream maker and churn according to manufacturers instructions. During the last 5 minutes of churning, add the chocolate chips. Or reserve for topping.


Coffee Simple Syrup

*Note: I made coffee that was a 1 tablespoon + 1 teaspoon to 1 cup ratio.

3/4 Cup Coffee

3/4 Cup Sugar

In medium sauce pan, add coffee and sugar. Stir until combined. Over medium heat, bring to a gentle boil. Reduce heat between medium and low and simmer for five minutes. Remove from heat and cool.

Waffle Cones

This is where I level with you. I made attempted to make waffle cones, sans a waffle cone maker. This process involved tape, wax paper and a glue stick. You see where I'm going with this, right? Okay, so it wasn't a shining culinary moment. Next time I'll make traditional cannoli shell pieces. Moving on...


Related Posts with Thumbnails